0. 만들 것
일단 리듬 게임은 2D Scene에서 진행 후, 이후 3D Scene에 변환 작업을 거치려고 한다.
원래 삽질해야 머리 속에 더 잘 들어오고 그런거다..
오늘 만들 것은 방향키 대로 입력하면 사라지는! 것을 구현 해볼 것이다.
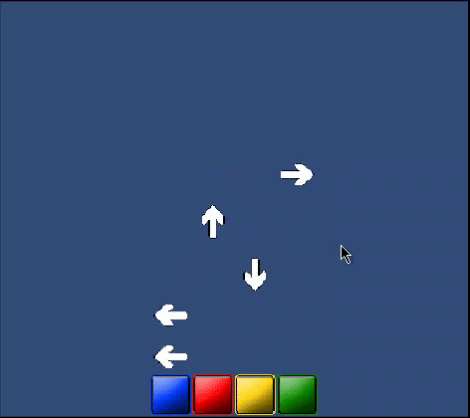
1. Button Controller
해당 버튼에 맞춰 키보드를 눌렀을 때, 눌리는 듯한 Button Image를 적용시켜준다.
using UnityEngine;

public class ButtonController : MonoBehaviour
{
    private SpriteRenderer theSR; // 버튼에 대한 스프라이트 렌더러
    public Sprite defaultImage;
    public Sprite pressedImage;

    // 키보드로 노트를 누르도록
    public KeyCode keyToPress;

    // Start is called once before the first execution of Update after the MonoBehaviour is created
    void Start()
    {
        theSR = GetComponent<SpriteRenderer>();
    }

    // Update is called once per frame
    void Update()
    {
        if(Input.GetKeyDown(keyToPress)) // 키를 눌렀을 때
        {
            theSR.sprite = pressedImage; // 이미지가 바뀜
        }
        if(Input.GetKeyUp(keyToPress)) // 키를 뗐을 때
        {
            theSR.sprite = defaultImage; // 기본 이미지로 돌아옴
        }
    }
}
2. 화살표가 내려오는 속도 스크립트
아무 버튼이나 누르면 화살표 내려오는 것이 시작 되도록 한다.
beatTempo의 값은 음악의 표준값이라고 불리는 120으로 설정해주었다.
using UnityEngine;

public class BeatScroller : MonoBehaviour
{
    public float beatTempo; // 떨어지는 속도
    public bool hasStarted; // 누르면 화면 아래로 스크롤 시작

    // Start is called once before the first execution of Update after the MonoBehaviour is created
    void Start()
    {
        beatTempo = beatTempo / 60f; // 초당 얼마나 빨리 움직여야 하는지
    }

    // Update is called once per frame
    void Update()
    {
        if(!hasStarted)
        {
            // 아무 키나 누르면 true되도록
            if(Input.anyKeyDown)
            {
                hasStarted = true;
            }
        }
        // 화살표가 y축으로 이동
        else
        {
            transform.position -= new Vector3(0f, beatTempo * Time.deltaTime, 0f);
        }
    }
}
3. Hit시 화살표 사라지도록 하기
3.1 Button에서 해주어야 할 것들
- Box Collider 2D 컴포넌트를 넣고 Is Trigger를 체크
- Rigidbody 2D 추가 후 Body Type을 Kinematic으로 변경
- 키네마틱 : 물리적인 힘이나 중력에 영향을 받지 않고, 직접적인 스크립트나 애니메이션을 통해서만 움직일 수 있는 상태
3.2 Arrow에서 해주어야 할 것들
- Circle Collider 2D 추가
- 아래의 스크립트 컴포넌트 추가
3.3 Hit시 사라지게 하기 위한 스크립트 작성
using UnityEngine;

public class NoteObject : MonoBehaviour
{
    public bool canBePressed;
    public KeyCode keyToPress;

    // Start is called once before the first execution of Update after the MonoBehaviour is created
    void Start()
    {

    }

    // Update is called once per frame
    void Update()
    {
        if(Input.GetKeyDown(keyToPress))
        {
            if(canBePressed)
            {
                gameObject.SetActive(false);
            }
        }
    }

    private void OnTriggerEnter2D(Collider2D other)
    {
        if(other.tag == "Activator")
        {
            canBePressed = true;
        }
    }

    private void OnTriggerExit2D(Collider2D other)
    {
        if (other.tag == "Activator")
        {
            canBePressed = false;
        }
    }
}
만약 오류 발생 시, Button의 tag가 Activator로 설정되어 있는지 확인한다.
코드 설명
- 노트가 판정 구역에 들어가면, canBePressed가 true로 설정되어 노트를 누를 수 있는 상태가 된다.
- 플레이어가 keyToPress에 설정된 특정 키를 누르면, 노트가 판정 구역에 있을 때 해당 노트는 비활성화되어 사라진다.
- 노트가 판정 구역을 벗어나면 canBePressed가 false로 설정되어 더 이상 눌릴 수 없다.
'개발일지 > Unity 6 [미제]' 카테고리의 다른 글
| [Unity 6 - 프로젝트] 리듬 게임 4) Timing Hits에 따른 Score와 Effect (2) | 2024.10.27 |
|---|---|
| [Unity 6 - 프로젝트] 리듬 게임 3) Score & Combo System 개발 (1) | 2024.10.26 |
| [Unity 6 - 프로젝트] 리듬 게임 2) 음악 재생 & Miss 노트 (0) | 2024.10.25 |
| [Unity 6 - 프로젝트] 3D 캐릭터 이동 및 애니메이션 구현 (1) | 2024.10.23 |
| [Unity6] 를 활용한 프로젝트 시작 (0) | 2024.10.23 |